How to add a new role for supplier
Goal
Create a new role with specific permissions that can be assigned to users to control their access to different features within the system.
Definition
A role in RBAC is a named collection of permissions that represents a job function or responsibility within an organization. Roles are assigned to users (or groups) to grant access to resources and actions.
Core characteristics
-
Named collection of permissions
- A role groups related permissions
- Permissions define what actions can be performed on which resources
-
Represents job function or responsibility
- Roles map to business functions (e.g., "Booking Advisor", "Fleet Manager")
- Not tied to specific individuals
-
Assigned to users
- Users are assigned one or more roles
- Users inherit permissions from their assigned roles
-
Follows least privilege
- Roles contain only the minimum permissions needed for the function
- Users get only what they need
Common role types
- Functional roles: Based on job function ("Booking Advisor", "Fleet Manager")
- Project roles: Temporary roles for specific projects
- Privileged roles: Administrative roles with elevated permissions
Benefits of role-based access
- Simplified management: Assign roles instead of individual permissions
- Consistency: Same role = same permissions across users
- Scalability: Easy to add users by assigning roles
- Auditability: Clear view of who has what access
- Compliance: Easier to demonstrate access controls
In summary, a role is a reusable set of permissions that represents a job function, assigned to users to grant appropriate access to resources.
Related Articles
- Edit Role Permissions (link when published)
- Assign Role to User (link when published)
Navigate to Administration
- From the left navigation menu, expand
Settingsby clicking on it - Select
Administrationfrom the Settings submenu
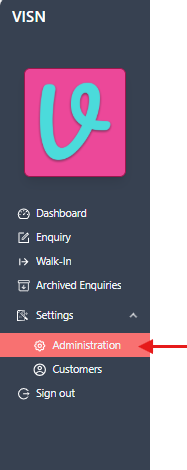
- The Administration page displays with several administrative options
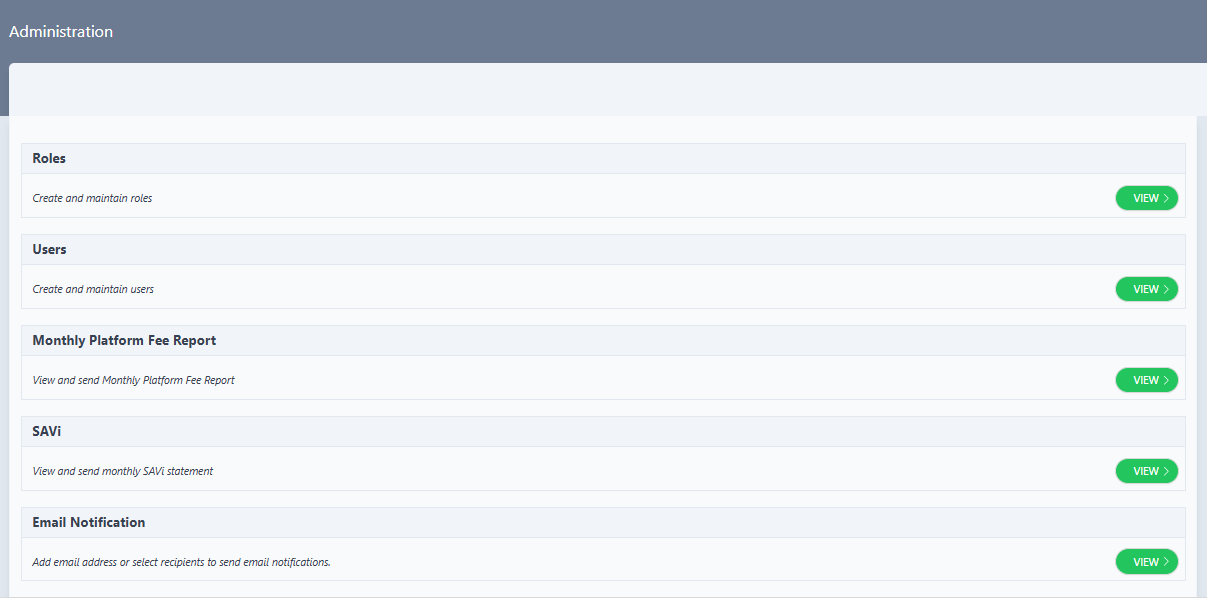
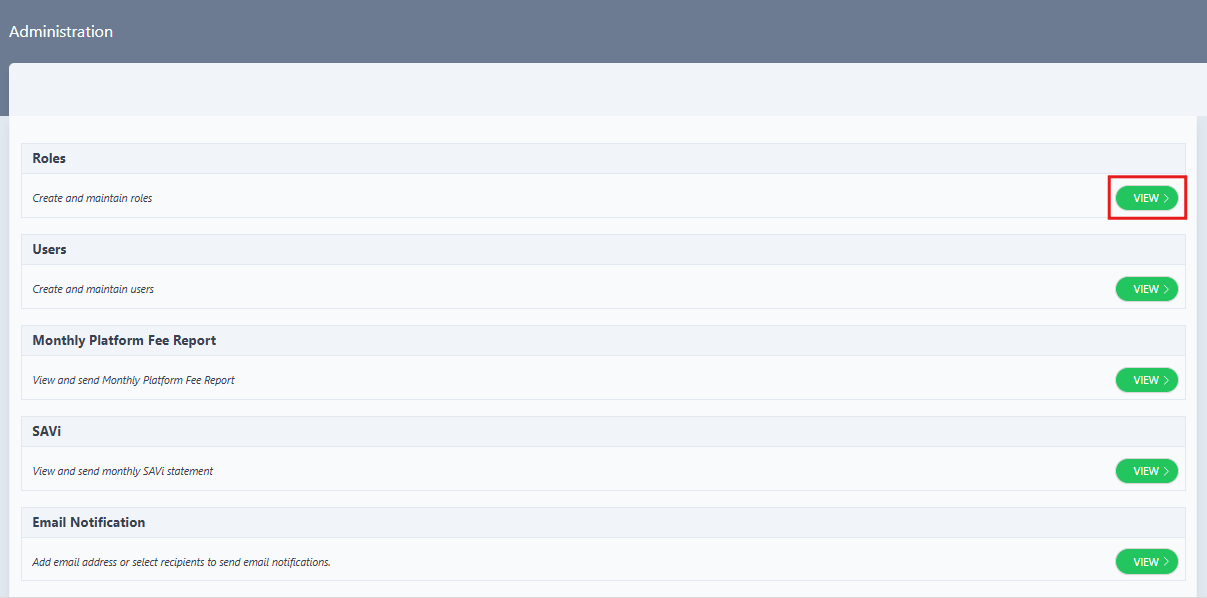
Access Roles Management
- On the Administration page, locate the Roles section
- The Roles section displays:
- Title: "Roles"
- Description: "Create and maintain roles"
- Click the VIEW > button on the right side of the Roles section
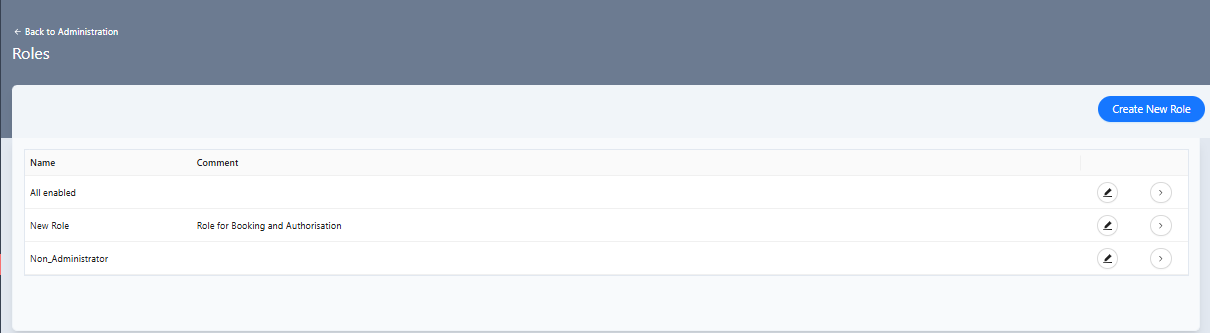
View Roles List
- The Roles page opens, displaying a list of existing roles
- The Roles page shows:
- A Create New Role button in the top right corner
- A table listing existing roles with columns for "Name" and "Comment"
- Action icons (edit and view) for each role

Create New Role
- Click the Create New Role button in the top right corner of the Roles page
- "Add Role" drawer opens on the right side
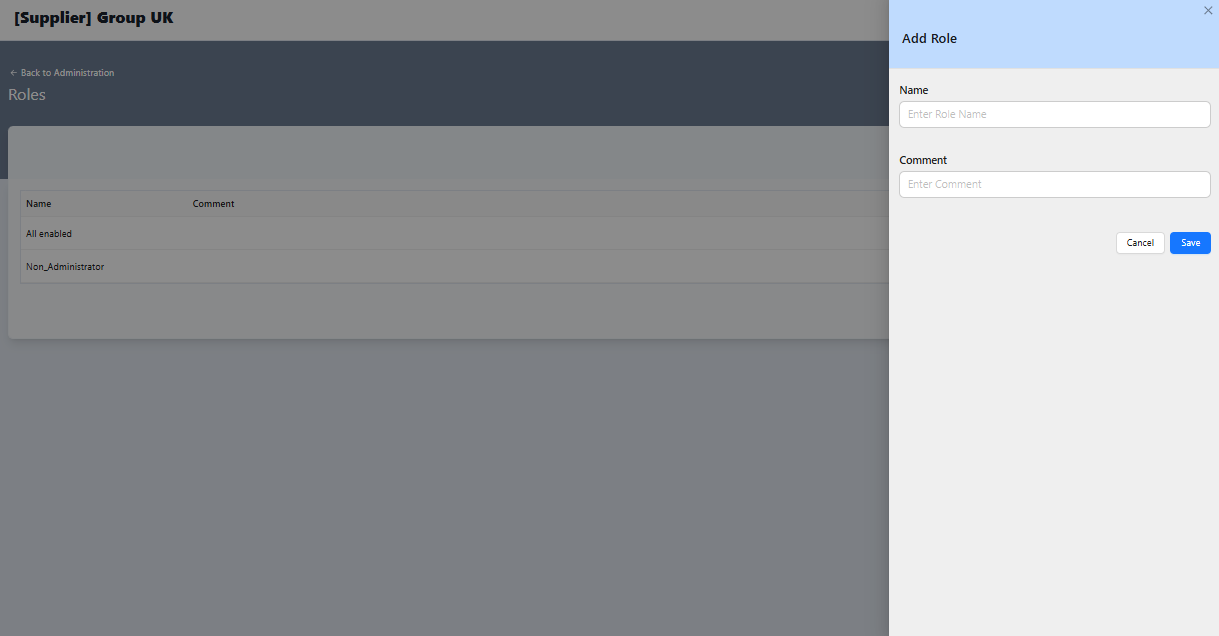
Fill in Role Details
- In the "Add Role" drawer, enter the following information:
- Name: Enter a name for the role
- Comment: Enter an optional description explaining the purpose of this role

- Use clear, descriptive names that indicate the role's purpose
- Avoid special characters or spaces where possible
- Consider using underscores for multi-word names (e.g., "Booking_Manager")
Save the Role
- Click the Save button to create the role
- The drawer closes and the new role appears in the roles list
To cancel the role creation, click the Cancel button or the X icon in the top right corner of the drawer. Any entered information will be discarded.
Verify Role Creation
- After saving, the new role appears in the roles list table
- Verify that:
- The role name appears correctly in the "Name" column
- The comment (if provided) appears in the "Comment" column
- Edit and view action icons are available for the new role
View Role Details
- Click the
>icon (View Role) next to the newly created role to view its details
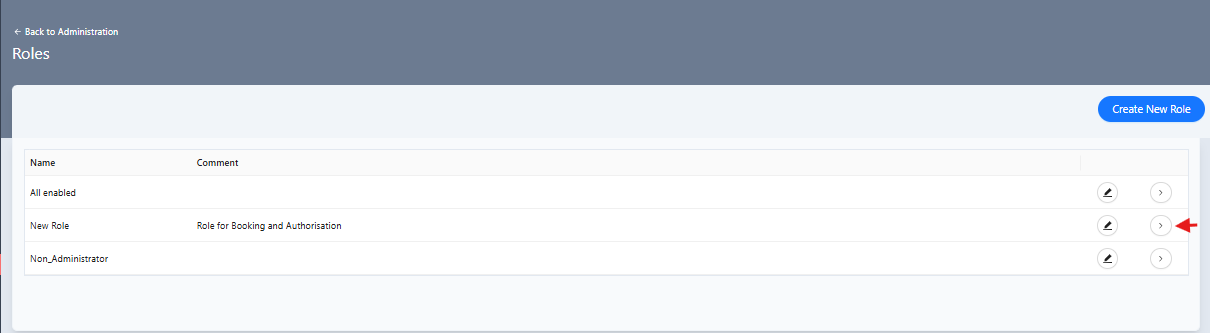
- The View Role page displays:
- Role name and comment at the top
- Permission sections organized by feature area (Dashboard, Enquiry, Settings, etc.)
- Current permission status for each feature
- An EDIT button to modify permissions
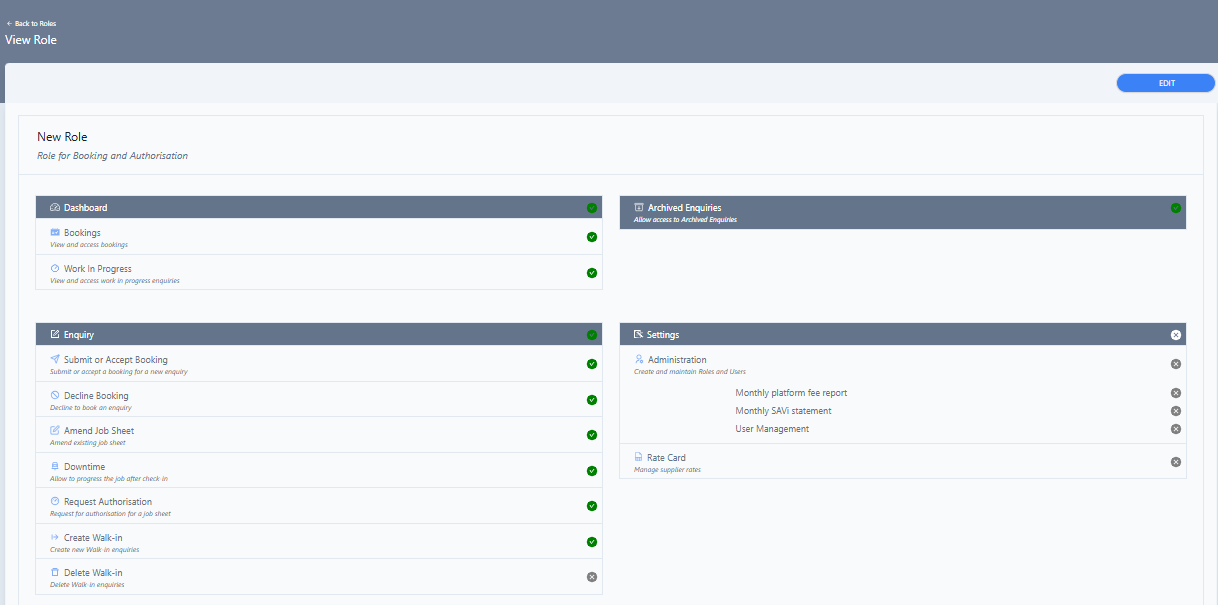
New roles are created with default permissions. The role may need to be edited to configure specific permissions based on requirements.
What Happens Next
- Role Created: The new role is saved in the system and available for assignment
- Permission Configuration: The role can be edited to configure specific permissions
- User Assignment: The role can be assigned to users during user creation or user profile updates
- Access Control: Users assigned to this role will have access based on the configured permissions
Troubleshooting
Create New Role button not visible
Problem: The "Create New Role" button is not displayed on the Roles page.
Solutions:
- Verify the account has administrator permissions
- Check that the logged-in account has role management access
- Refresh the page and try again
- Contact the system administrator if the issue persists
Role name already exists
Problem: An error message appears indicating the role name already exists.
Solutions:
- Choose a different, unique name for the role
- Check the existing roles list to see what names are already in use
- Consider adding a suffix or prefix to make the name unique (e.g., "Booking_Manager_Branch_A")
Role not appearing in list after save
Problem: The role was saved but doesn't appear in the roles list.
Solutions:
- Refresh the page to reload the roles list
Related Tasks
- Edit Role Permissions: Configure specific permissions for the newly created role
- Assign Role to Users: Assign the role to users who need this level of access
Status: Draft
Category: Protected
Authored By: Arun Kumar on December 03, 2025
Revisions