How to invite a new user to a supplier account
Goal
Invite a new user to join the VISN platform. The invited user will receive an email with a registration link to complete their account setup.
Related Articles
- Edit User Details (link when published)
Navigate to Administration
- From the left navigation menu, expand
Settingsby clicking on it - Select
Administrationfrom the Settings submenu
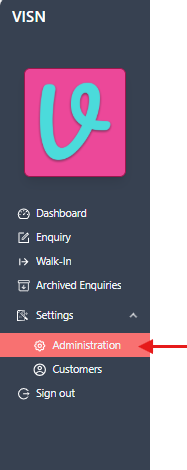
- The Administration page displays with several administrative options
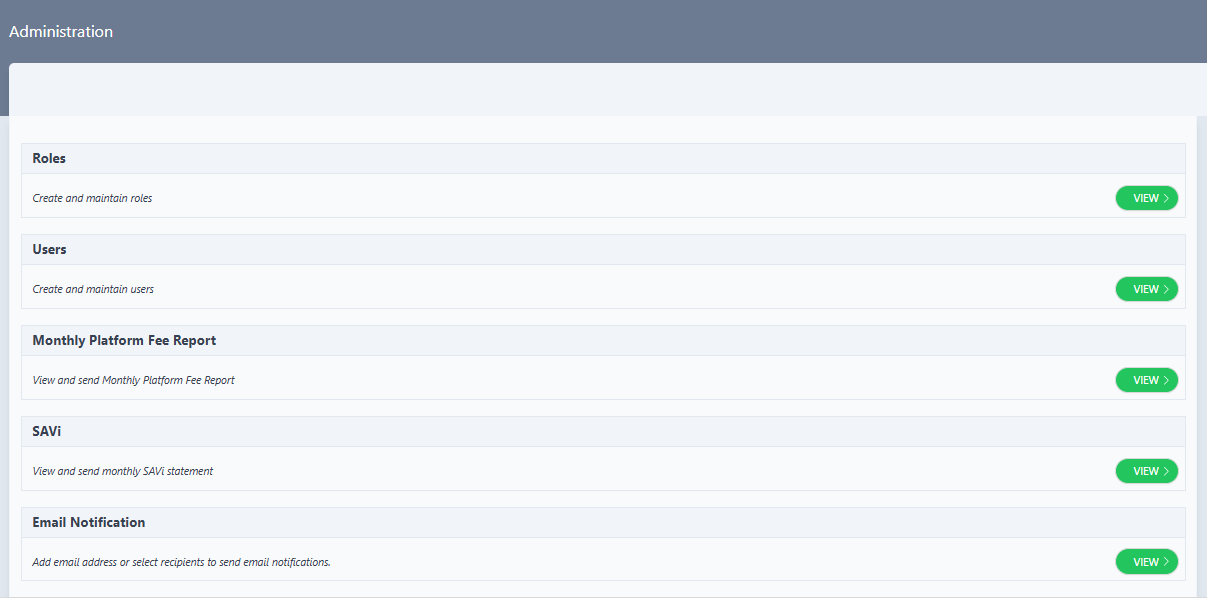
Access Users Management
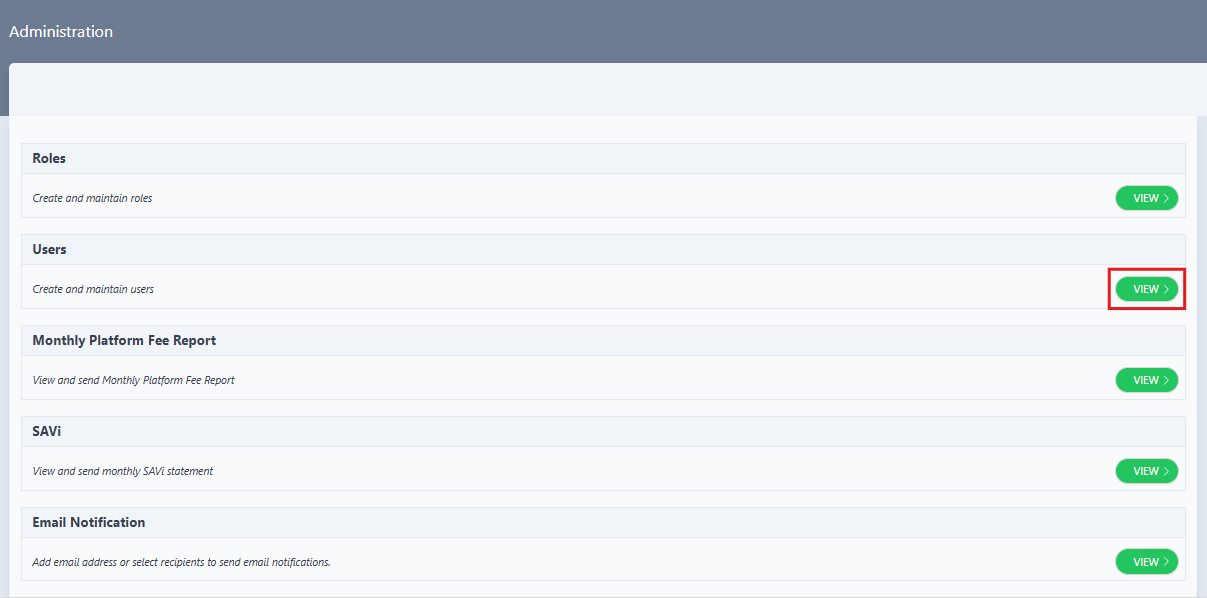
- On the Administration page, locate the Users section
- The Users section displays:
- Title: "Users"
- Description: "Create and maintain users"
- Click the
VIEW >button on the right side of the Users section
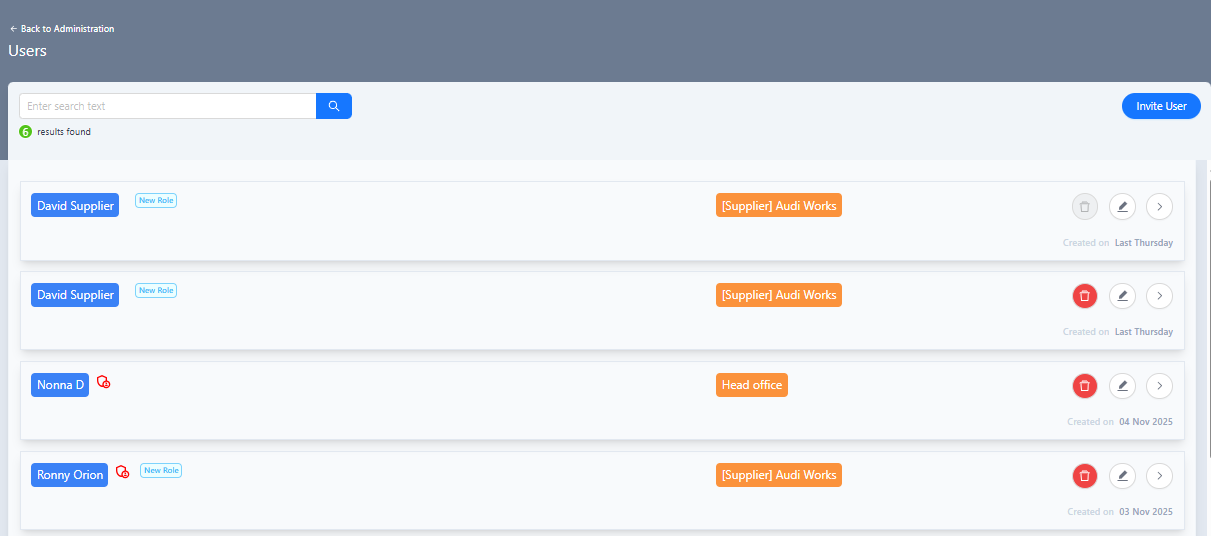
View Users List
- The Users page opens, displaying a list of existing users
- The Users page shows:
- An
Invite Userbutton to invite new users - A table listing existing users with relevant information
- Action icons for managing users
- An
Open Invite User Drawer
- Click the
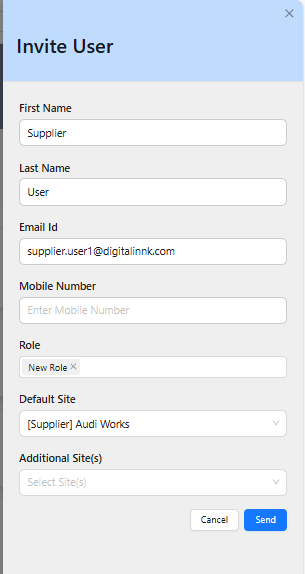
Invite Userbutton to invite a new user - The Invite User drawer opens, displaying a form with required fields

Fill in User Details
- In the "Invite User" drawer, enter the following information:
- First Name: Enter the user's first name
- Last Name: Enter the user's last name
- Email Id: Enter a valid email address for the user
- Mobile Number: Enter the user's mobile number (optional)
- Role: Select or enter the role to be assigned to the user
- Default Site: Select the default site from the dropdown
- Additional Site(s): Select any additional sites if needed (optional)
User Invitation Best Practices
- Ensure the email address is valid and accessible by the user
- Select an appropriate role that matches the user's responsibilities
- Choose the correct default site to ensure proper access
Cancel Option
To cancel the user invitation, click the Cancel button or the X icon in the top right corner of the drawer. Any entered information will be discarded.
Send the Invitation
- Review all entered information to ensure accuracy
- Click the
Sendbutton to send the invitation email - The drawer closes and a success notification appears in the top right corner of the screen confirming the invitation
- The notification displays:
- A green checkmark icon
- Title: "Invite user"
- Message: "xxxx has been invited successfully"
- The notification automatically disappears after a few seconds

Email Delivery
The invitation email is typically delivered within a few minutes. If the user doesn't receive the email, check the spam/junk folder or resend the invitation if necessary.
Receive Invitation Email
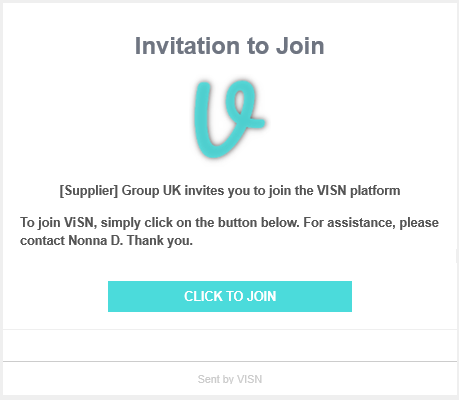
- The invited user receives an email invitation to join ViSN
- The invitation email contains:
- A welcome message from the supplier group (e.g., "xxxx invites you to join the VISN platform")
- Instructions to join the VISN platform
- A
CLICK TO JOINbutton that links to the registration page - Footer indicating "Sent by VISN"
Access Registration Page
- Click the
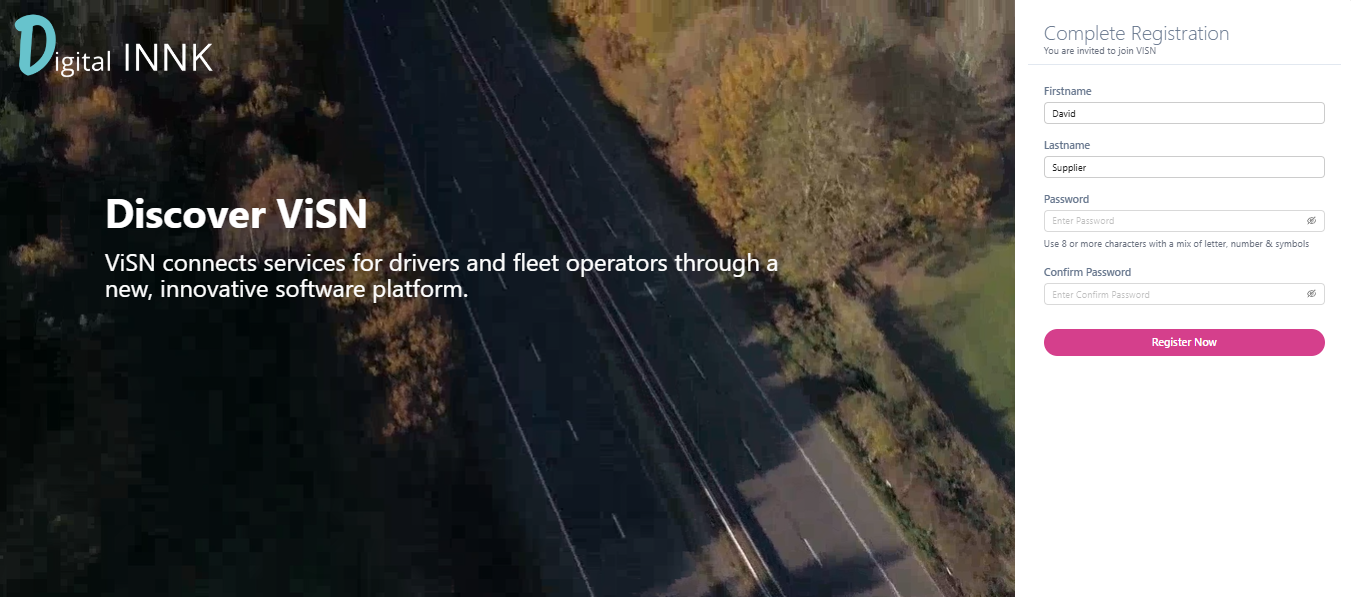
CLICK TO JOINbutton in the invitation email - The registration page opens, displaying the "Complete Registration" form
- The page shows:
- Title: "Complete Registration"
- Subtitle: "You are invited to join VISN"
- Form fields for completing registration
Complete Registration Form
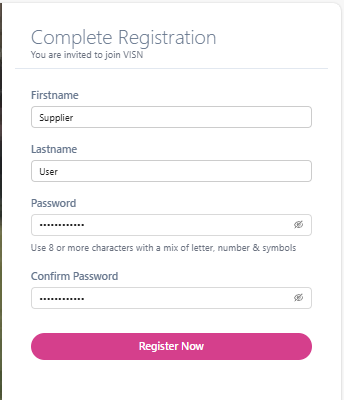
- Fill in all required fields in the registration form:
- Firstname:
- Enter the user's first name in the "Firstname" field
- Lastname:
- Enter the user's last name in the "Lastname" field
- Password:
- Enter a secure password in the "Password" field
- Password requirements: "Use 8 or more characters with a mix of letter, number & symbols"
- Use the eye icon to toggle password visibility
- Confirm Password:
- Re-enter the same password in the "Confirm Password" field
- Use the eye icon to toggle password visibility
- Ensure both password fields match
- Firstname:
Password Security
- Use a strong, unique password that meets all requirements
- Avoid using easily guessable information
Submit Registration
- Review all information to ensure accuracy
- Verify that both password fields match
- Click the
Register Nowbutton to complete registration - The form validates the password requirements and confirms password match

Registration Success
- After successful registration, a success notification appears in the top right corner
- The notification displays:
- A green checkmark icon
- Title: "Registration Completed"
- Message: "xxxx registered successfully"
- A close (X) icon to dismiss the notification

Account Activation
- Once registration is complete, the user account is activated
- The user can now sign in to the VISN platform using:
- The email address that received the invitation
- The password they created during registration
Troubleshooting
User Management View button is disabled
Problem: The "View >" button is disabled on the Administration page.
Solutions:
- Verify the account has administrator permissions
- Check that the logged-in account has user management access
- Contact the system administrator if the issue persists
Email address already exists
Problem: An error message appears indicating the email address is already registered.
Solutions:
- Verify if the user already has an account in the system
- Check if a pending invitation exists for this email
- Use a different email address if creating a new account
- Contact the system administrator to resolve duplicate accounts
Invitation email not received
Problem: The user reports not receiving the invitation email.
Solutions:
- Verify the email address was entered correctly
- Check the user's spam/junk folder
- Resend the invitation if necessary
- Contact support if the issue persists
Related Tasks
- Edit User Details: Modify user information after invitation
- Resend Invitation: Send a new invitation if the original was not received
Status: Draft
Category: Protected
Authored By: Arun Kumar on December 08, 2025
Revisions